Calibrite ColorChecker Display review - formerly X-Rite i1Display Studio

The Calibrite ColorChecker Display is an excellent device, either for new users who are looking into getting their monitors calibrated for the first time or seasoned color management nerds. It offers the same sensor as the more expensive Calibrite ColorChecker Display Pro model, but with capped measurement speed and simpler software.
X-Rite vs. Calibrite products: a quick explanation
Calibrate is a spin off company created to market X-Rite solutions for the photo, video and content creation markets. X-Rite still handles all the product development and core technologies, while the new company will be responsive for distribution and marketing of those product lines.
In practice, the Calibrite ColorChecker Display, Pro and Plus models are just rebranded X-Rite i1Display Studio, Pro and Pro Plus, respectively. The i1Profiler software used on the Pro and Plus versions is now called ccProfiler, while the simpler i1Studio is now called ccStudio.
The new versions of the software will keep compatibility with the past X-Rite branded products, as they all still work just fine with the free DisplayCAL software.
During this transition, keep in mind that some good deals can be had on the remaining stock of X-Rite branded colorimeters. I'll link the latest Amazon prices for both versions below.
X-Rite i1Display Studio = Calibrite ColorChecker Display
X-Rite i1Display Pro = Calibrite ColorChecker Display Pro
X-Rite i1Display Pro Plus = Calibrite ColorChecker Display Plus
Before we dive in: why calibrate your monitor?
The first question every creative professional asks before buying a monitor calibration tool is: do I really need to calibrate my monitor?
And the answer, as you might already know, is a resounding YES!
It all comes down to confidence in the color displayed by your monitor. If your work depends on accurate color, it makes sense to invest a little bit of money and – more importantly – willingness to learn into it.
There's a bit of learning curve involved and that's true for all products on this field and color management in general.
Be it photography, video production, illustration or design, having access to a color accurate monitor can improve the quality of your work and help you to deliver more professional results for clients.
When I worked with print design, 20 years ago, having access to a calibrated monitor was one of the factors that allowed me to prepare print-ready files and bypass the prepress bureau on the local offset printing company. That meant better prices, faster turnaround for clients and more profit for me.
Arguably, purchasing a monitor calibration tool is a worthwhile investment even for general computer usage. Think of it as a relatively inexpensive monitor upgrade that can extract the most quality from your existing display, or get close color response between two different monitors.
Based on my tests, modern monitors drift very little over time, so it’s safe to rent a colorimeter or maybe even share the cost of one among a group of friends.
Instead of just spreading magical marketing fairy dust into the world, our focus here is to explore who is this product for and set realistic expectations on what to expect from it and color management in general.
If you're in a hurry, here's the quick take:
The Calibrite ColorChecker Display is an excellent device, either for new users who are looking into getting their monitors calibrated for the first time or seasoned color management nerds thanks to the excellent support from DisplayCAL, a free and open source monitor calibration software with very advanced capabilities.
It offers the same sensor as the more expensive Calibrite ColorChecker Display Pro model, but with capped measurement speed and simpler software.
Compared to the more popular and similarly priced Datacolor SpyderX Pro, the Calibrite ColorChecker Display has better third-party support in DisplayCAL and offers slightly better sensor quality, specially when measuring dark tones. Both are pretty close in terms of quality, but I'd still pick the Calibrite ColorChecker Display for those reasons.
So let's dive in. Or, if you prefer, jump directly to the test results and detailed comparisons with other similar devices.
How does a monitor color calibration tool work?
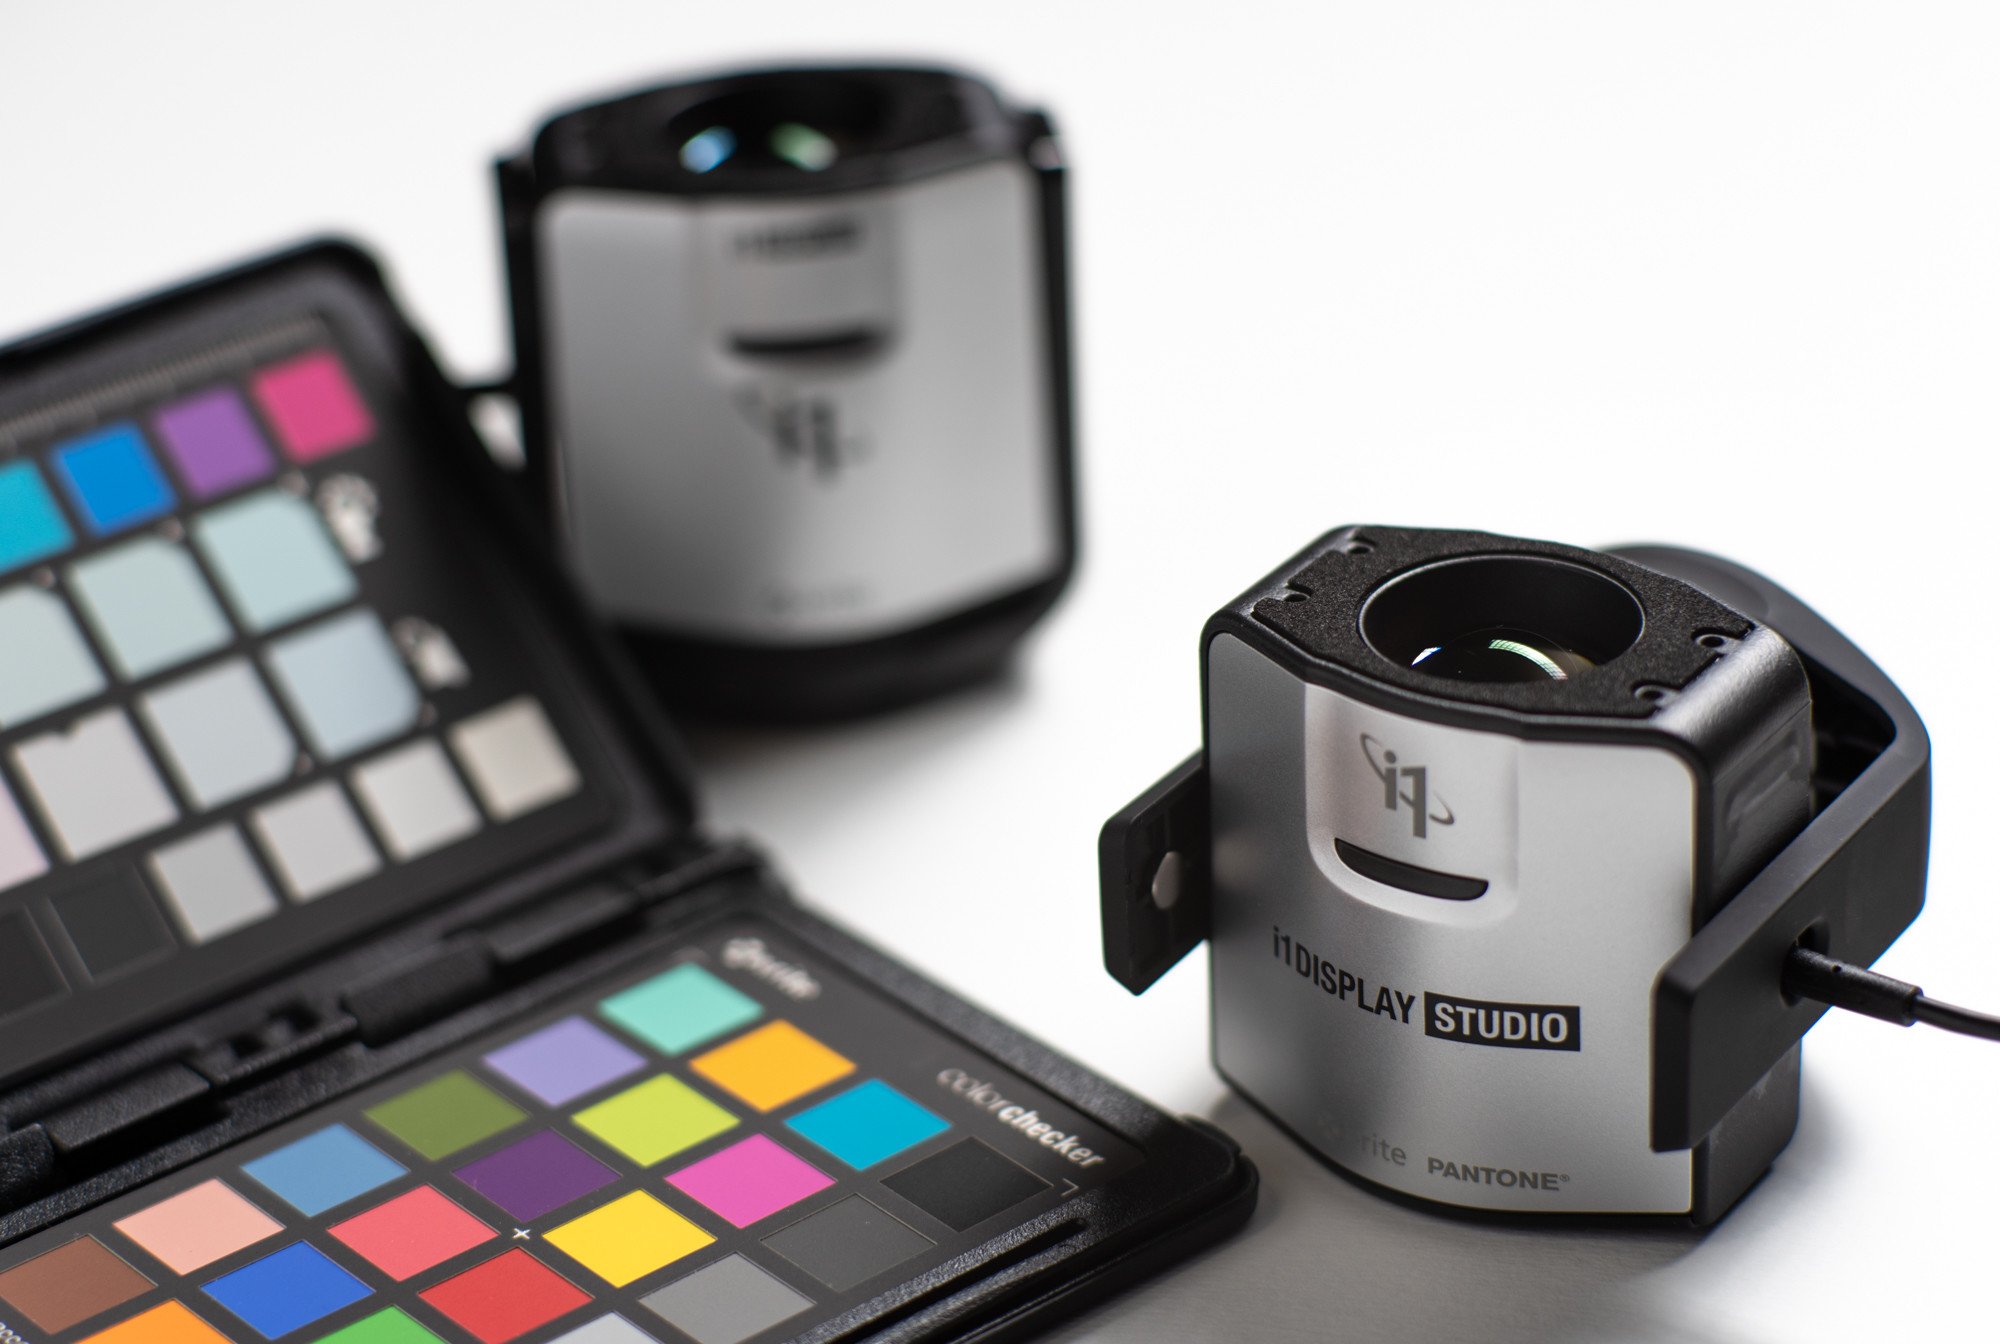
The Calibrite ColorChecker Display is a color measurement device called colorimeter. It can precisely measure colors on monitors and projectors and compare them to a known value. The difference between measured color and original is used to create a color profile describing how that particular monitor behaves.
In a nutshell, a color profile can be used in all color managed apps and operating systems to compensate for the monitor response and deliver accurate color. That includes MacOS, Windows 10, Lightroom, Photoshop, Adobe Creative Suite apps, most web browsers, video editing programs, etc.
Keep in mind that this device can measure and calibrate only monitors and projectors, but not printers. Check out the Calibrite ColorChecker Studio / X-Rite i1Studio (without Display in the name) model instead if you're doing your own fine art printing or delivering design proofs.
Calibrating your display alone goes a long way towards getting a good match between printer and screen, specially with how good canned manufacturer profiles for most high-end printers are nowadays.
Making sense of this confusing lineup nomenclature
X-Rite and Datacolor are the two main companies selling affordable color measurement devices for the amateur and prosumer market. Both seem to make an effort to name their product lineup in the most confusing way possible.
Let's shed some light on it.
X-Rite monitor calibration tools
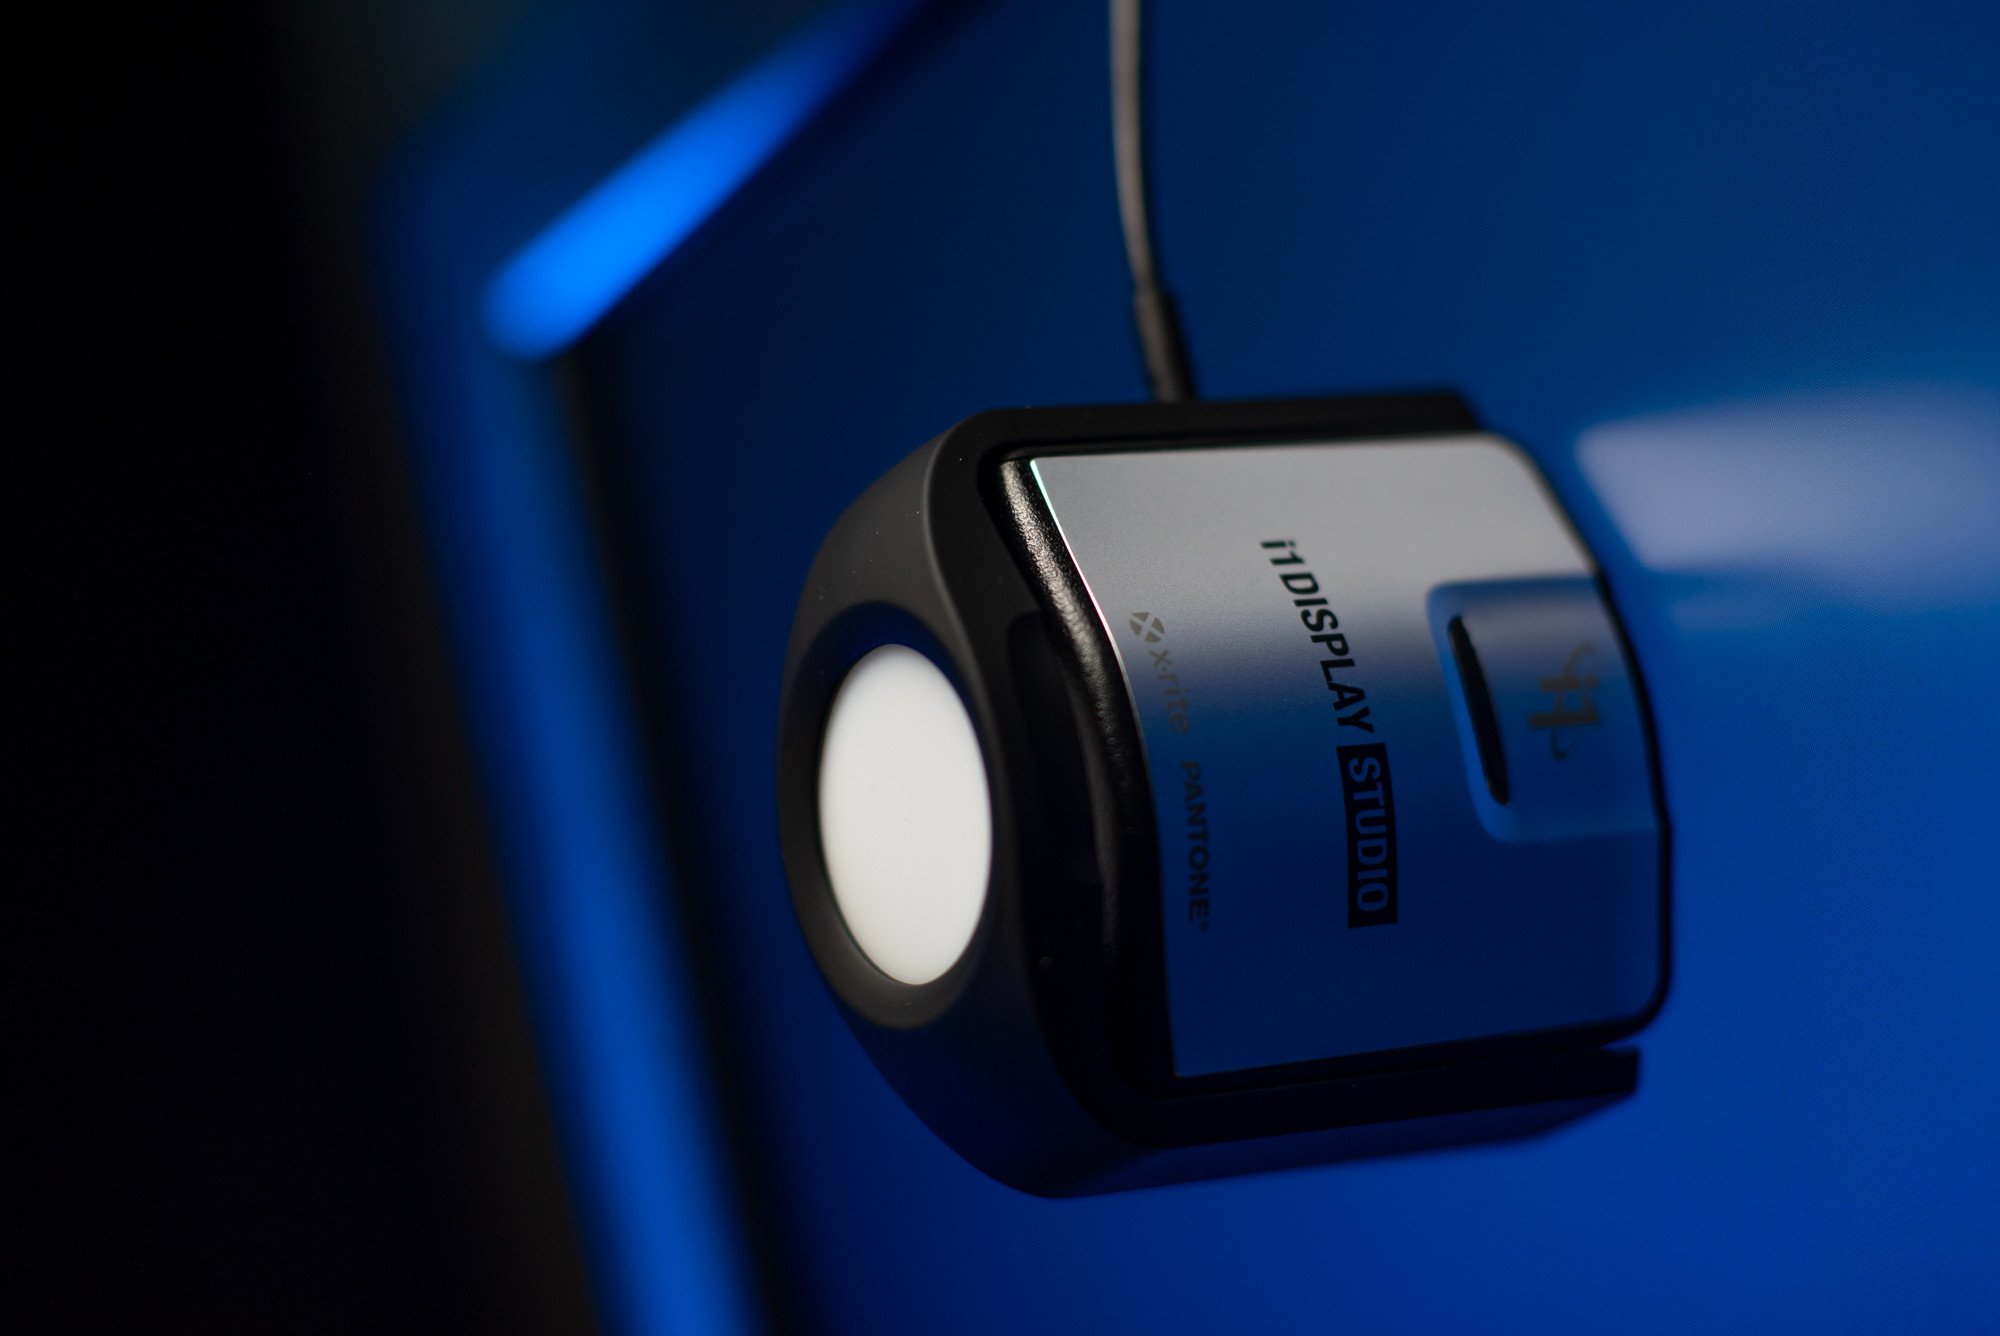
Calibrite ColorChecker Display uses the ccStudio software and is their entry level monitor calibration tool. Colorimeter. Monitor and projector calibration only. Previously called i1Display Studio and Colormunki Display.
Calibrite ColorChecker Display Pro uses the fully-fledged ccProfiler software. Colorimeter. Monitor and projector calibration only.
Calibrite ColorChecker Display Plus is very similar in terms of hardware and uses the same ccProfiler software, but has slightly better measurement performance for darker tones and can calibrate HDR displays up to 2000 nits of max brightness. Colorimeter. Monitor and projector calibration only.
Calibrite ColorChecker Studio is an entry level spectrophotometer capable of calibrating printers, monitors, projectors and scanners (with an optional target). It's less accurate than an i1Display for monitor calibration, though, specially on darker tones. Previously called i1Studio and Colormunki Photo.
Printer calibration works very well with this unit and it can also be paired with Argyll CMS for more demanding printer calibration workflows, at the expense of ease of use.
X-Rite i1Photo Pro 3 is a professional monitor and printer calibration solution based on the i1Pro 3 spectrophotometer. Uses the i1Profiler software for both monitor and printer calibration.
There's also an X-Rite i1Photo Pro 3 Plus model with an improved spectrophotometer and additional packages for CMYK+ printer profiling and other professional uses.
Same hardware, same underlying software, lower price
All models on the Calibrite ColorChecker Display lineup offer essentially the same underlying hardware and virtually the same resulting profile quality, with very few differences.
The lower priced Studio model has a simplified software package. It's designed to guide new users, step by step, trough the calibration process and hide most of the complexity behind it.
There are fewer target options available, but all the most popular settings for photography, print, video and general computer usage are well covered.
Under the simplified user interface it has the same highly regarded software engine used on ccProfiler. The resulting profiles generated by both programs are indistinguishable.
The only real hardware difference between Studio and Pro models is measurement speed. The Studio version is artificially capped in firmware to half the measurement speed offered by its more expensive siblings. Pro models can do a full calibration in about 3 minutes, while the Studio takes close to 6 minutes using the same number of measurements.
Something to keep in mind is that only the Pro models are licensed by Calibrite to work on third-party applications, such as those used with high-end displays for true hardware calibration.
If you have a high-end display from NEC, BenQ, Dell, Eizo or Asus ProArt, make sure to check the compatibility list for their respective software before purchasing this unit.
The Calibrite ColorChecker Display is not supported by any of those manufacturers at the time of this writing.
This doesn't affect compatibility with the amazing and free DisplayCAL software. And the Studio version works great with it! More on that below.
The only real hardware difference between Calibrite ColorChecker Display and Display Pro models is measurement speed. The non-Pro version is artificially capped in firmware to half the measurement speed offered by its more expensive siblings.
Datacolor monitor calibration tools
Datacolor SpyderX is the most popular product for monitor calibration and judging by the number of Amazon reviews it clearly dominates the mindshare for this market.
SpyderX Pro is their entry level display calibration tool. Comparable to Calibrite's ColorChecker Display and in the same price range.
SpyderX Elite can also calibrate digital projectors and offers additional tools to check the quality of your display, more advanced calibration targets for video standards and tools to help match multiple displays in a studio environment. Same hardware and profile quality as the less expensive Pro model.
Datacolor still sells the SpyderPRINT model for printer calibration. It's offered standalone or bundled in the SpyderX Studio package. Don't waste your money. It's an old product that does a bad job at printer calibration and is much inferior to the similarly priced ColorChecker Studio. I had one years ago.
The Datacolor SpyderX Pro is much faster than the Calibrite ColorChecker Display and often a little cheaper. It's an excellent device with no dealbreakers. But the Calibrite model still has an edge in terms of profile quality.
Test results
Overall, the Calibrite ColorChecker Display did an excellent job at calibrating all displays I tried. The resulting profiles were indistinguishable from its more expensive Pro sibling and always spot on in terms of color response, with no strange color casts or unexpected results.
When I reviewed the Datacolor SpyderX Pro I compared it to a Toyota Corolla, so maybe the ColorChecker Display is, errrr... a Honda Civic... Both are predictable and dependable, if not a bit boring, which are excellent qualities to have on a monitor calibration device.
The base model uses a smaller 118 patch set for calibration, while the Pro models can choose from 118 to 461 patches using the included ccProfiler software.
That difference may sound big on paper, but in practice the profiles generated by both colorimeters were basically identical, from the smallest to the largest patch set.
I was able to double check those results by using DisplayCAL with both devices. Resulting profiles were equivalent, but the Studio version took about double the time to measure the same number of patches.
Keep in mind, though, that monitor quality plays a big role with these findings. Not only that, but also selecting the right monitor settings to begin with.
All the monitors used in my tests are reasonably well behaved and were set up the best way possible. This means that the correction matrices generated in the form of each profile are smoother. In comparison, a bad quality display would require steeper correction in order to conform to the calibration target.
For lesser quality monitors, a larger patch set can make a visible difference. The Pro model can have an edge on those cases.
This process is not all that dissimilar from using the Photoshop curves to color correct an image. The steeper the color corrections, the more likely we'll get visible banding and a histogram full of gaps, specially if the original file (or monitor internal LUT) is only 8 bit.
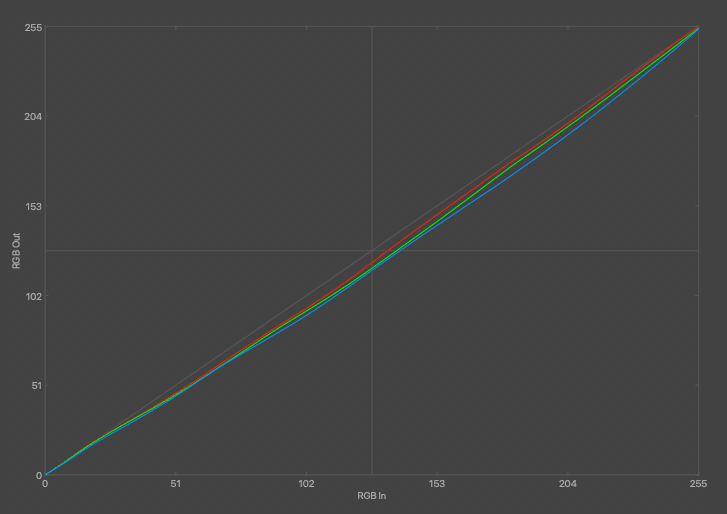
Good quality monitors usually require minimal calibration curves.
User interface and usability
The simplified user interface on the ccStudio software does a great job of reducing the complexity for new users while still offering access to the most common calibration settings for most use cases.
It has presets for video (DCI P3, Rec.709, NTSC, PAL SECAM and Rec.2020, each with preset target luminance and gamma curves) and Photo (D65 / 6500K, 120cd/m2 and 2.2 gamma).
A custom mode allows users to fine tune those settings. White point can be set at D50, D55, D65, D75 and native. Luminance can be set from 60 cd/m2 to 250 cd/m2 or native. And gamma can be set to 2.2, sRGB or a custom value.
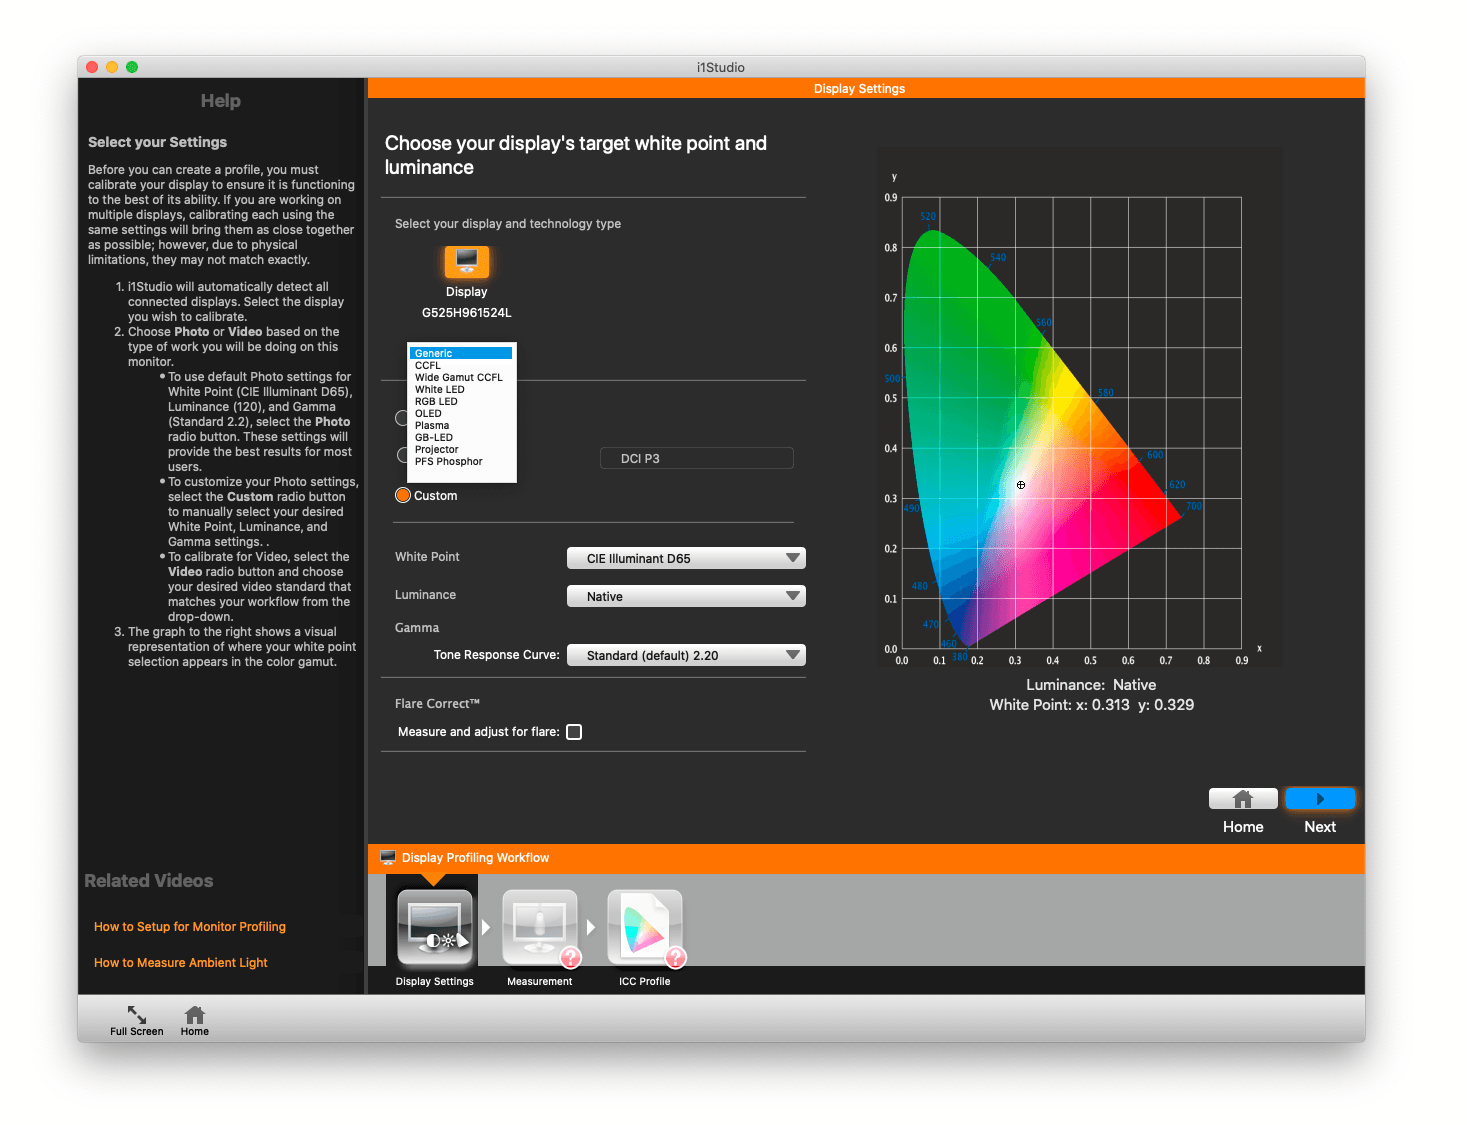
The step-by-step user interface is beginner friendly and offers helpful hints for each setting.
Anyone who needs a calibration target outside from those values can always use DisplayCAL.
The ColorChecker Display does a good job at detecting most common monitor backlight types. It probably has a database somewhere to correlate monitor and backlight.
There are options for generic, CCFL (fluorescent), Wide Gamut CCFL, White LED (most newer displays, including Apple MacBooks and iMac), RGB LED, OLED, Plasma, BG-LED, Projector and PFS Phosphor.
Why is this important?
Colorimeters, like the Calibrite ColorChecker devices or the Datacolor SpyderX models, need to be corrected in software for each different type of backlight in order to be able to measure accurate color values.
If we select the wrong preset, for example, the most usual result is a strong color cast and completely off white point color temperature.
While the ColorChecker Display correctly identified all the five different monitors I tried, it's important to know that this detection process is not perfect. Always check the spec sheet of your monitor to know what kind of backlight it has and also the expected color gamut. That will be important in order to verify the resulting profile later on.
One of the reasons I recommend the ColorChecker Display is the fact that it can be updated to new display types in software, unlike the SpyderX Pro which have those corrections baked in firmware. It also comes with support for more monitor types out of the box. The SpyderX doesn't support OLED displays, for example.
That opens up a world of possibilities for the color nerds like myself. For example, with DisplayCAL it is possible to create 100% custom monitor corrections for each monitor model using a spectrophotometer. And those corrections can be shared with or downloaded from other users with the same display.
That has the potential to improve the white point measurement and overall profile quality with displays using more uncommon types of backlight.
My main display is a Dell 30" wide gamut using a CCFL backlight and for that specific case there was no benefit with a custom correction using an ColorChecker Studio / i1Studio spectrophotometer compared to the built in preset.
More importantly, being able to update those correction matrices contributes for the device longevity. I've been using an X-Rite i1Display Pro for over 9 years now and several new types of backlight were introduced by the manufacturer in that period.
Nothing is perfect
Despite the excellent experience with the Calibrite ColorChecker Display and, so far, glowing review, nothing is perfect and this device has some shortcomings to be aware of.
First and more importantly, be aware that a $150 colorimeter is made to a price point and there is some unit to unit variance. This is true for all models under USD 500.
I only have one unit to test here, but Dry Creek Photo tested 13 units and found a max dE variance of 1.6. ChromaPure, a company that develops video calibration software, compared 15 units with several types of display and found larger differences for some backlight types.
I was able to experience that first hand when comparing my unit with the i1Display Pro and SpyderX Pro.
My copy of the i1Display Studio / ColorChecker Display consistently measured white point about 200K lower than all other devices I compared it to. This was noticeable when viewing a neutral or grayscale image, where the resulting profile looked a little bit cooler than the others.
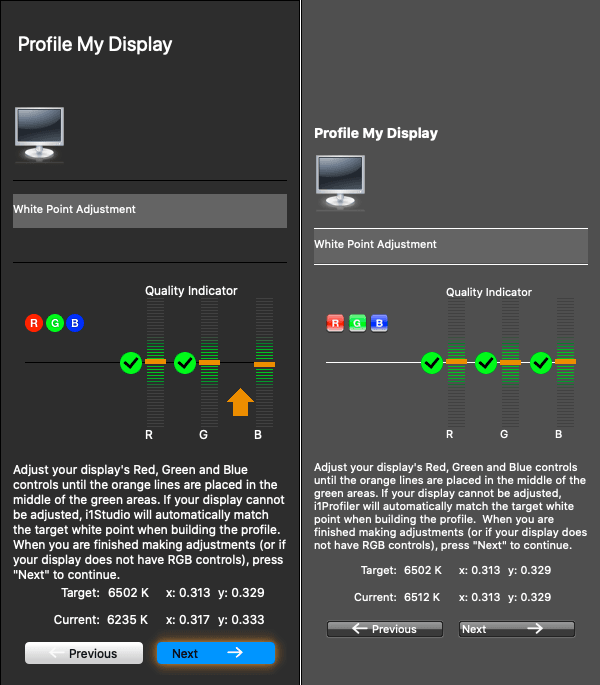
Same monitor and settings, different white point results. i1Display Studio / ColorChecker Display on the left and i1Display Pro on the right. The Calibrite ColorChecker Display is made to a price point and some unit to unit variance is expected.
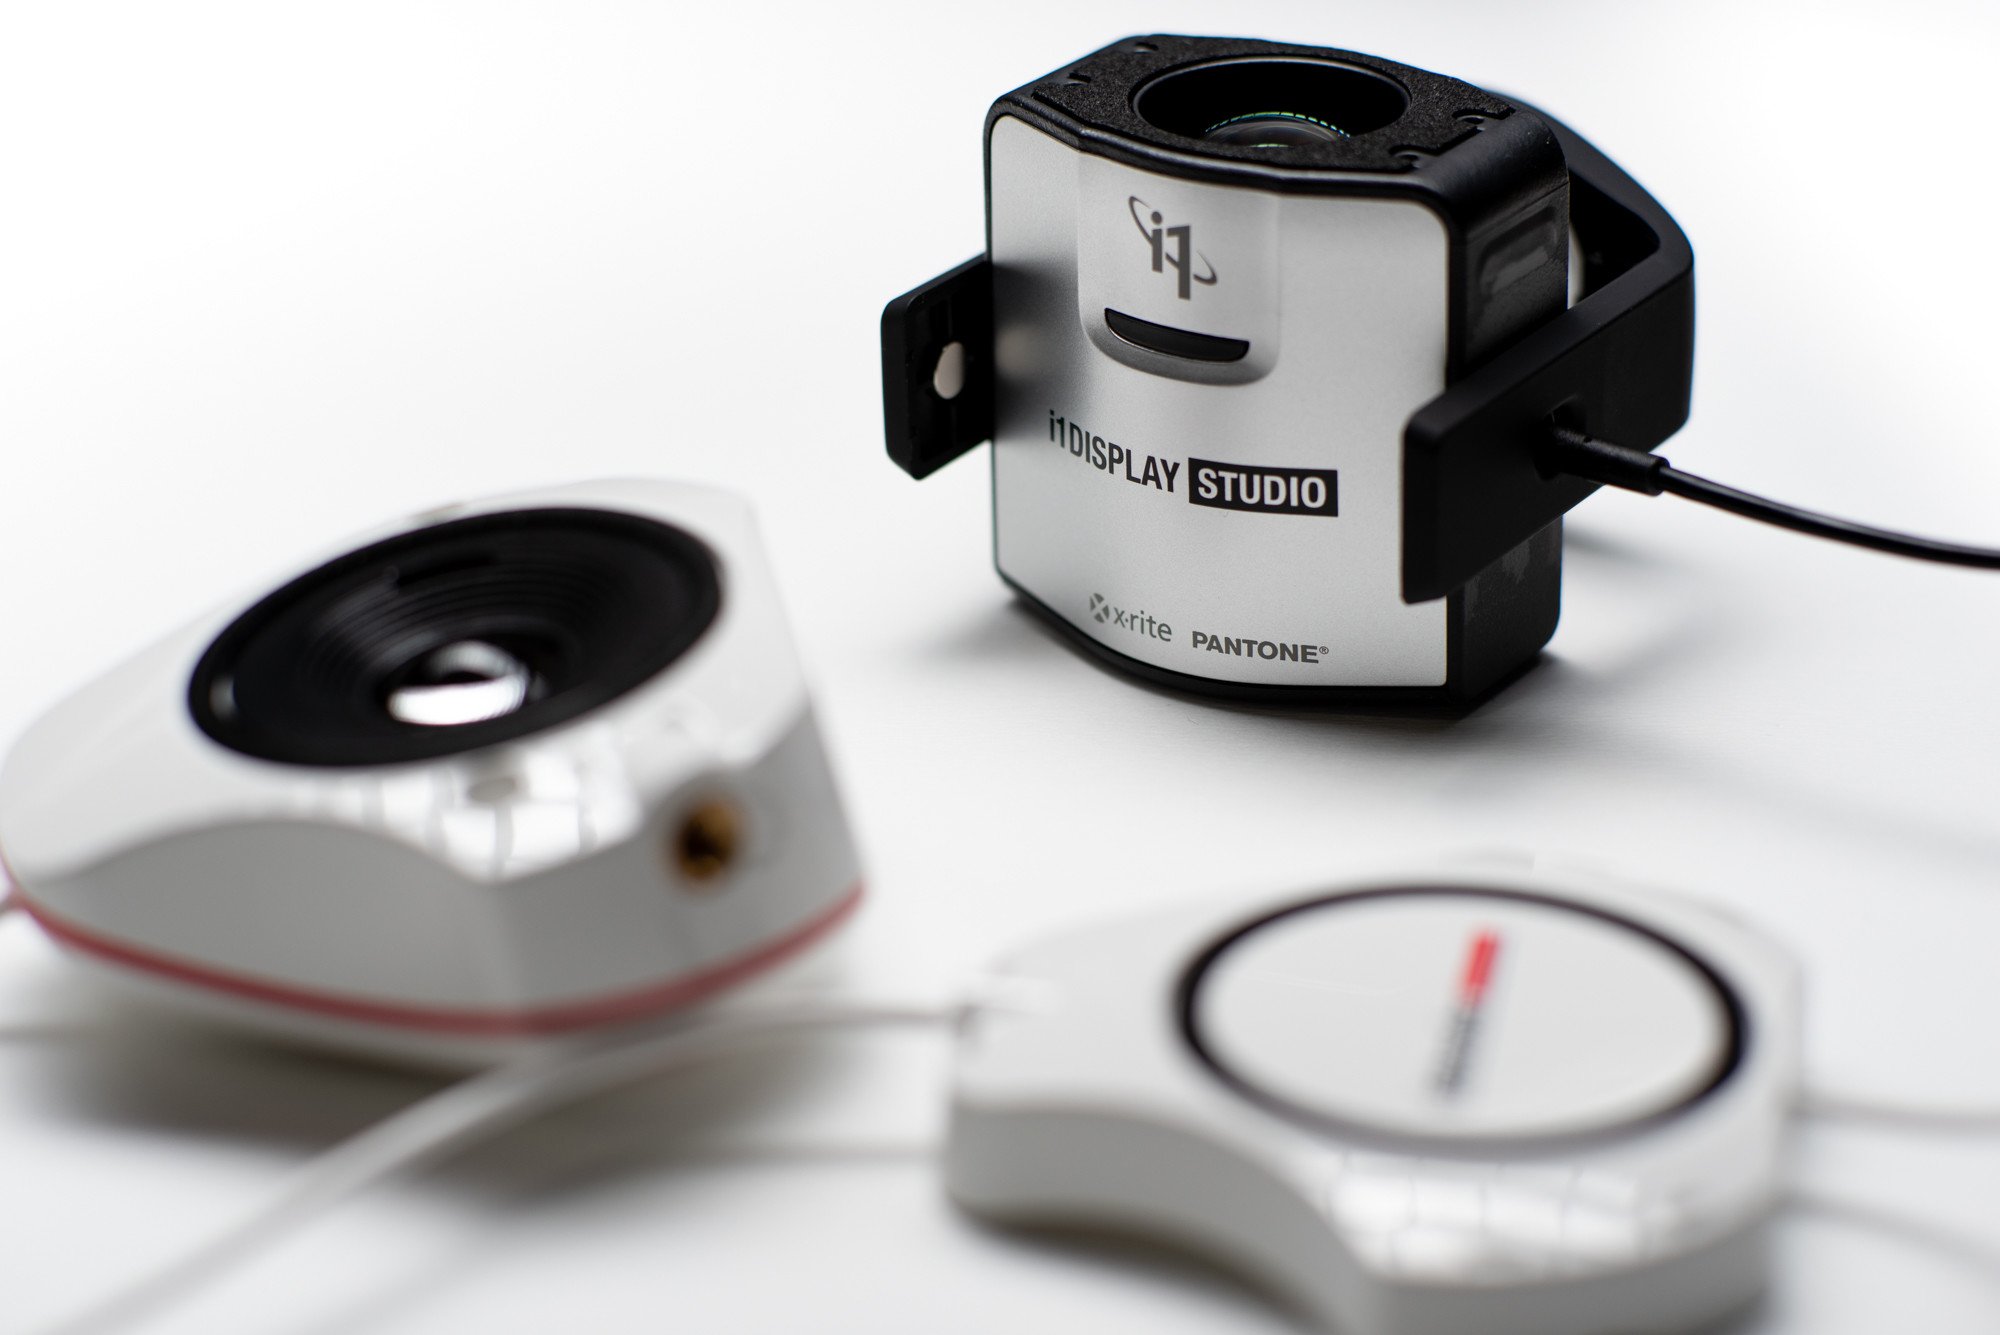
Using DisplayCAL instead of the included software showed the same results. To confirm my findings, I fired a white point measurement using a ColorChecker Studio spectrophotometer. Despite the similar name, that is a different type of device, a spectrophotometer that can calibrate monitors and also printers.
The spectrophotometer is less susceptible to white balance errors due to the way it measures colors. Spectrophotometers measure the whole color spectrum instead of using color filters that match how our eyes see color. Think of it as absolute color vs. relative color. X-Rite has a good article about this topic.
Scientifically I cannot state that any of those devices is perfect and should be used as a reference, not even the spectro. But anecdotally I can attest that my i1Display Pro unit and the ColorChecker Studio spectrophotometer agreed exactly, while the Datacolor SpyderX was very close and the i1Display Studio subject of this review was the most distant from the correct white point.
The bottom line is: keep in mind that this is a $150 device and not a $9,000 JETI Specbos 1211 Reference Spectroradiometer.
And also keep in mind that this unit to unit variance is also present on all other similarly priced monitor calibration tools, be it from X-Rite or a Datacolor SpyderX.
The software used to generate the profiles employs some clever math inside to minimize errors in individual measurements or unit to unit variance.
In my particular case, that difference was only visible in grayscale images, which looked cooler using the ColorChecker Display profiles compared to the other devices. In color images they all looked remarkably close and with no real perceptible color differences.
Speed (or lack thereof)
The other shortcoming with the ColorChecker Display is the slower measurement speed. Generating a profile with the same number of patches takes double the time compared with the Pro version. And the SpyderX is even faster.
That can be a valid issue for users with dozens of monitors to calibrate in a professional environment. A large advertising agency, for example.
As much as a like fiddling around with my calibrators, that's a big selling point for some users and something that can easily justify the extra investment on the Pro model or choosing a SpyderX Pro instead.
ColorChecker Display with the included ccStudio software took 5 minutes and 20 seconds to perform a full calibration using 118 patches, which is the only option available.
The same number of patches with a ColorChecker Display Pro took just 2 minutes and 55 seconds. If we switch to the more comprehensive 461 patches, the Pro model took 12 minutes and 6 seconds for the whole process.
The SpyderX Pro is in a totally different league in terms of speed, taking just 1 minute and 12 seconds to generate a full profile from zero. Speed is a usability factor and the faster the process, the more inclined users will be to perform it more often and keep their monitors calibrated.
On the other hand, the faster and simpler strategy used by the SpyderX for profiling resulted in profiles with a little more banding than the X-Rite products. That is a symptom of too few points used on the calculation.
Hardware construction
In terms of hardware construction, there's not much to say. It is well thought and is easy to balance with large displays and laptops alike. The tripod thread and included diffuser makes projector profiling easy. Everything feels good and functional, but not really premium, which aligns well with the price point.
The only real negative I can see about it is that X-Rite uses a rubberized coating that turns sticky over time. My Pro unit got sticky after about 5 years in a hot climate.
If that ever happens to you, it is possible to remove the coating using isopropyl alcohol. You'll end up with a very ugly, but perfectly working monitor calibrator. Just make sure to protect the lens and diffuser while doing it.
Third-party support with DisplayCAL
One of the most important selling points of the ColorChecker Display / i1Display Studio, in my opinion, is the excellent support provided by the free DisplayCAL software.
DisplayCAL is a free display calibration and profiling software that is compatible with most measurement devices on the market.
It provides much more advanced and flexible options than the bundled software and can be used in a variety of use cases from the most common calibration targets to complex video 3D LUTs or calibration targets specific for video and color grading. The possibilities are almost endless.
This also contributes for the longevity of this device. The hardware itself is proven and seems to age gracefully, with little deviation after years of use.
Generally speaking, the limitation is in the software itself and for how long the manufacturer is going to provide updates or add corrections for new types of displays.
With open source, like DisplayCAL and the underlying Argyll CMS library, we can safely say that this device will be well supported and useful for a long time, instead of becoming e-waste.
DisplayCAL also bridges the gap from Studio to Pro model, delivering the same resulting quality and plethora of calibration options for both devices.
The only limitation is calibration speed. The less expensive Studio model takes double the time to measure and generate the same profile, no matter the software used.
On the negative side, DisplayCAL is less intuitive than the bundled ccStudio software and lacks the clear step-by-step wizard and helpful instructions it provides. Users that are new to color management will be better served by the bundled ccStudio software.
Datacolor SpyderX Pro.
Calibrite ColorChecker Display vs. Datacolor SpyderX Pro
Datacolor made great improvements to their latest SpyderX lineup, making it an easy recommendation for most users.
Notably, it now has a new lens design that helps the unit to focus more light on the color sensor, improving accuracy on low light readings like dark tones. That was my #1 complaint with their previous Spyder5 model.
It's also super fast, taking just 1 minute and 12 seconds for a full calibration in my tests, while the Calibrite ColorChecker Display takes 5 minutes and 20 seconds for the same process.
On the other hand, the ColorChecker Display still has an edge in terms of profile quality. Compared directly, it shows better shadow detail and less noticeable banding in all monitors I tested.
Another advantage of the X-Rite model is having support for more types of monitors and being upgradeable in software for new types of backlights. The SpyderX has those corrections baked in firmware and so far no updates were released for it.
A notable omission on the SpyderX side are OLED and Plasma displays that the i1 model can handle with no problem.
For those reasons, the Calibrite ColorChecker Display is usually a better purchase for most users, with the exception of use cases that require faster measurement speed, like agencies and large studios with dozens of displays.
If you find a good deal on a SpyderX Pro, go for it. Here in Brazil, for example, we can usually find it for 30% less than an ColorChecker Display and the real world difference in quality between both devices is small.
SpyderX also works really well with DisplayCAL, but the measurement speed falls dramatically. When using DisplayCAL, the ColorChecker Display / i1Display Studio is actually faster than the SpyderX.
I wouldn't hesitate using a SpyderX for professional work, specially if paired with DisplayCAL. Just be aware of the differences and make an informed decision.
Check out our in-depth Datacolor SpyderX Pro review.
Calibrite ColorChecker Display vs. Pro and Plus models
Apart from price, there are two main differentiation factors between Display and Pro models: speed and extra features.
The Calibrite ColorChecker Display Pro / i1Display Pro model is twice as fast than the cheaper non-Pro version. This speed advantage also remains when using the third-party DisplayCAL software since it's baked in firmware.
Actual sensor quality is the same, but the extra features sometimes can make a difference in the end result, as the Pro model can user larger patch sets for potentially better profiles in monitors that stray further from the calibration target.
In other words, the Pro model can get better results from bad displays. Just don't expect a huge difference. Getting a better display to start with is always a wiser investment.
Having access to the more feature rich ccProfiler software in the Pro model also opens up new calibration targets, like extra video standards and less common gamma curves.
If you have a higher end monitor with true hardware calibration capabilities, keep in mind that the Studio version is not compatible with any of the OEM software packages from Dell, BenQ, NEC, Eizo, etc.
You can always use it to profile those displays in software using either ccStudio or DisplayCAL, but it wouldn't be possible to adjust it internally that way.
Generally speaking, the ColorChecker Display Pro is compatible with all those programs, but always make sure to check the updated compatibility lists before purchasing a calibrator, if your monitor offers true hardware calibration.
As for the Calibrite ColorChecker Display Plus model, it has a revised sensor with better measurement performance in darker tones and the ability to profile HDR monitors with a higher maximum brightness up to 2000 nits or cd/m2. This ability can be important for videographer or colorists running a HDR workflow, or users with OLED monitors that can achieve lower black levels.
Calibrite ColorChecker Display vs. Calibrite ColorChecker Studio
Despite the similar name, those are completely different devices.
The Calibrite ColorChecker Studio model, without the "Display" in the name, is a spectrophotometer that can also calibrate printers. It uses the same ccStudio software but unlocks the printer profiling section in it. Formerly known as i1Studio and Colormunki Photo.
For monitor calibration, the ColorChecker Studio spectrophotometer has some difficulty measuring darker tones and generally speaking will deliver worse calibration quality compared to the i1Display model.
It has an inherent advantage of being a spectrophotometer, which is being able to measure any type of monitor backlight without needing a correction matrix. You can read more about colorimeters vs. spectrophotometers here.
For printer profiling, it works surprisingly well. It's a very simple process and can deliver a printer profile 80% as good as a professional-grade equipment in most cases. It certainly did the job with a few printers I have here, including an Epson 3800 that is suitable for fine art reproductions.
One key advantage the ColorChecker Display / i1Studio spectrophotometer has is full compatibility with Argyll CMS. This open source package can be used for the most demanding calibration cases and opens up a world of possibilities even with a lower priced equipment like the i1Studio spectro. But keep in mind that it's a command line only package and there's a steep learning curve involved.
Also consider that printer profiling isn't always necessary. Most current fine art inkjet printers come with very good canned profiles for the most common types of papers and usually drift little over time.
Having a good quality monitor and, most importantly, controlled viewing conditions are much more important factors to achieve a good match between monitor and prints.
All in all, stick to the ColorChecker Display for monitor profiling.
Conclusion
The Calibrite ColorChecker Display offers excellent value and is the best monitor calibration tool available in the $150 range, specially if paired with DisplayCAL.
It offers excellent hardware quality, with best in class measurement performance and a proven platform with 10 years on the market.
Degradation over time is not an issue with this hardware. User Czornyj on the Luminous Landscape forum tested 7 units manufactured from 2011 to 2017 and found very little variance, all under 1.5 dE.
Great third-party support from DisplayCAL and software upgradeable correction matrices for newer display types are an insurance against programmed obsolescence.
Who should avoid it
As much as I like this device, it's not perfect for everyone.
First of all, make sure your monitor hardware uses a good quality IPS panel that covers at least the sRGB colorspace and has a true 8-bit or higher internal LUT.
No monitor calibration device can save a bad display. TN or VA panels are not really suitable for color accurate work due to color shifts depending on the view angle.
Here are a few recommendations for the best monitors in various price ranges, from $200 to over $1000 USD.
If your monitor offers true hardware calibration, make sure to purchase a device that is compatible with the manufacturer calibration software.
Video editors or colorists using HDR monitors would be better served by the ColorChecker Display Plus model, which can handle measurements over 1000 nits in brightness. This can be an important factor in terms of product life expectancy as those displays get more popular over time.
My main calibration device is an X-Rite i1Display Pro model purchased in 2012 and it still works flawlessly almost 10 years after. I bet true HDR monitors will be very popular by 2030 and the extra $150 for a ColorChecker Display Plus model can be a wise investment if you're a pro video user.
Finally, if speed matters, the Pro model can save 3 minutes by calibration while the Datacolor SpyderX Pro is even faster, performing the complete process in just over 1 minute. This difference can add up quickly in a studio environment.
---
Hope you liked this article! If you have any questions, leave a comment below or reach out on Twitter or Reddit.