Datacolor SpyderX review (and a free hack to get the most of it)

The Datacolor SpyderX is a breakthrough product, but not for the usual reasons. Instead of creating the absolute best monitor color calibration tool, Datacolor built the Toyota Corolla of colorimeters: an affordable solution that is super simple to use and delivers results that are good enough for most users.
The Good
- Fast, easy to use and inexpensive.
- Well-rounded performance with results that are visually indistinguishable from units costing double its price.
The Bad
- Extreme low light performance still trails behind the competing products by X-Rite, like the similarly priced i1Display Studio.
- Hardware design is not upgradeable for future types of display backlight.
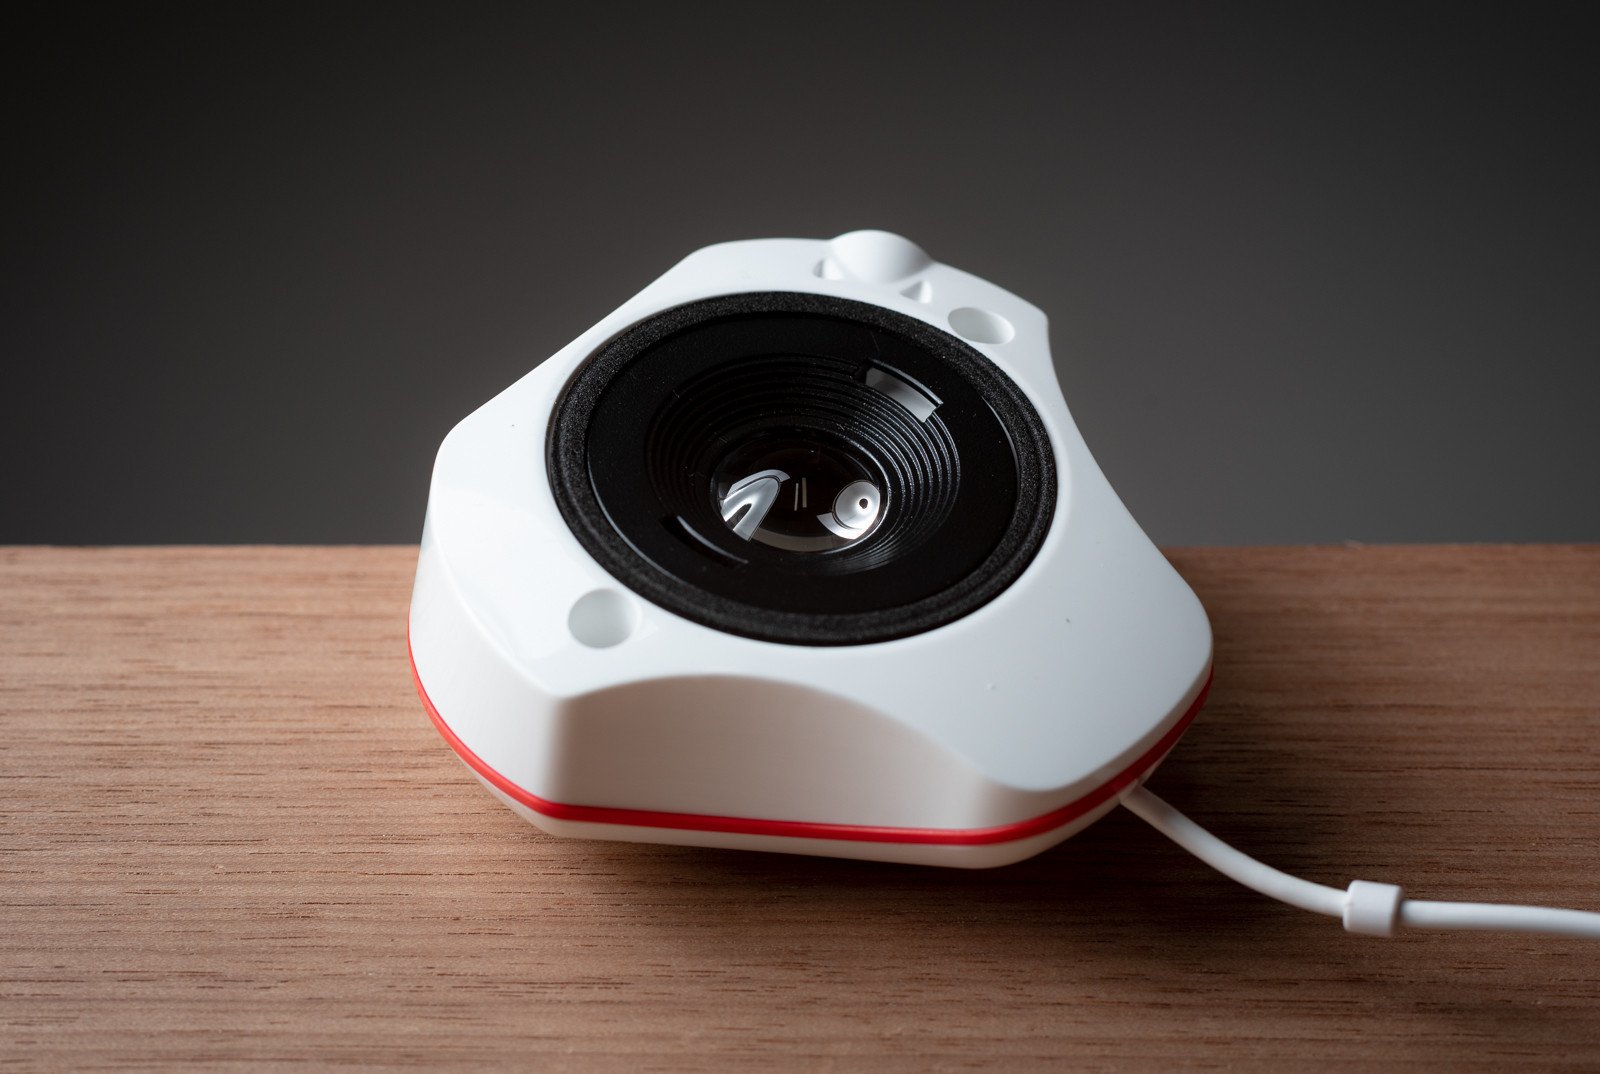
The Datacolor SpyderX is an excellent monitor calibration tool for the price. A new lens design helps the unit to focus more light on the color sensor, improving accuracy on low light readings like dark tones.
Before we dive in, let’s first get the most important questions out of the way:
Do you need to calibrate your monitor?
Absolutely, yes! Ideally, we all should work on calibrated displays that allow us to evaluate our work according to a universal standard. To base all your decisions regarding color on an unknown variable is the same as drawing on paper with the lights turned off.
The monitor is the main place of interaction between creative professional and digital work. An uncalibrated screen is an unknown variable. Your photographs, illustrations or designs can vary wildly in color from one display to another, and even more during printing, where any misstep can represent a big waste of money. Calibrating your monitor ensures that what you see is consistent from day to day and also follows a known universal standard.
The same logic applies not only to photography but also to all fields that require consistent color — for example, web, graphic and product design. If you care about colors in your work, you need to care about the tools you use to interact with them.
Arguably, purchasing a monitor calibration tool is a worthwhile investment even for general computer usage. Think of it as a relatively inexpensive monitor upgrade that can extract the most quality from your existing display, or get similar color response between two different monitors.
Based on my tests, modern monitors drift very little over time, so it’s safe to rent a colorimeter or maybe even share the cost of one between a group of friends. For less demanding work, calibrating a modern good quality IPS monitor twice a year is perfectly acceptable. My 30” wide gamut Dell display, for example, changed less than 3 dE on the worst color patch over a span of 3 years, which is hardly visible. On average, the difference in 50 color patches as measured by DisplayCAL was negligible at less than 1 dE. I saw worse but still reasonable results when testing a MacBook Pro monitor over time.
Is this the best monitor calibration tool in 2021?
Objectively, no. But it is more than enough for most users, including demanding use cases like display calibration for photographers or designers that need to deliver color accurate work to their clients.
The SpyderX Pro sits together with the X-Rite i1Display Studio on the sweet spot for the monitor calibration tool market: around USD 150. The alternatives below that range are simply not worth it and have to make too many compromises in terms of accuracy and longevity to achieve a lower price.
Above that range, the i1Display Pro is an excellent contender for higher end uses, but doesn’t offer necessarily better calibration quality, unless your particular monitor supports true hardware calibration. More on it below.
The most remarkable quality about this product is that, unlike earlier versions, the new SpyderX has no dealbreakers. It's an easy recommendation for most users and the price is right.
Datacolor focused their product development on fixing the most important shortcomings of their previous Spyder5 colorimeter.
The new lens design helps the unit to focus more light on the color sensor, improving accuracy on low light readings like dark tones. That was my #1 complaint with the Spyder5.
As a byproduct of that, the new SpyderX is also many times faster. Like on a camera, more light reaching the sensor or film means we can get by with a higher shutter speed.
So, what's the obsession with saving a couple of minutes? Well, it makes little sense for me. I'm a color geek. I enjoy spending half an hour calibrating each of my monitors. But, from an ease of use perspective, faster results are less frustrating and help to reduce the barrier of entry to convince users to calibrate their displays. "It'll take just a couple of minutes" is a great selling point.
Another crucial change was to improve measuring accuracy and inter-unit agreement, meaning that different devices will measure more closely between each other.
How good is good enough?
In my own tests, the SpyderX produced color profiles that were virtually indistinguishable from the X-Rite products, either using their respective bundled software or the free DisplayCAL software, which supports most devices on the market and offers more advanced calibration capabilities.
The only area I could see a small difference when switching between profiles was on the most extreme grayscale dark tones below L 12 on the LAB color space.
My main display is an old Dell 30" wide gamut LCD and its main shortcoming is grayscale banding caused by a limited 8 bit LUT. For that display, the SpyderX profile showed a little more banding on the extreme dark tones. On the other monitors tested, a MacBook Pro and a Philips 4K IPS LCD with 109% sRGB gamut, the difference between devices was even closer and I wouldn't be able to pick which is which on a blind test.
Comparing accuracy and raw performance between multiple devices on a scientific way goes beyond my own means of measuring. I prefer to focus my evaluation on actual results. On that sense, I wouldn't mind trading my i1Display Pro for a SpyderX. It does everything I need.
But, if you're looking for the upmost raw performance, the X-Rite devices still have an edge mainly in terms of low light performance. This is when I'll pass the mic to the people that specialize not on using their monitor calibrators like myself, but on building the actual tools that make it all work.
Tom Huffman, creator of the ChromaPure video calibration software, reviewed the SpyderX and measured raw sensor performance using high-end devices costing thousands of dollars. He concluded that the SpyderX has excellent overall accuracy and repeatability between measurements, although absolute low-light sensitivity still trails behind the X-Rite models.
When it comes to color management systems, Graeme Gill – author of the amazing open source Argyll CMS library – is the person to listen to. In summary, he found the SpyderX to be a good and cheap device, with limitations in terms of low light performance.
Finally, Florian Höch, the developer behind DisplayCAL, noted that the SpyderX doesn't support external correction matrices for different display technologies. This effectively limits the longevity of the device as those corrections can be used to support new types of displays that may appear in the future.
The Datacolor SpyderX Pro and Elite versions vary only in software capabilities. Most users will be fine with the less expensive Pro version.
Datacolor SpyderX Pro vs. Elite
The SpyderX colorimeter is available in two versions: Pro and Elite. Both use the same hardware and vary only in software capabilities.
Compared to the Pro version, the more expensive Datacolor SpyderX Elite can also calibrate digital projectors and offers additional tools to check the quality of your display, more advanced calibration targets for video standards and tools to match multiple displays in a studio environment. It can also calibrate digital projectors.
How important are those differences? Very little, for the vast majority of users.
Most users calibrating their monitors for photography, illustration, print design or even general computer usage should be covered by the standard calibration presets offered on the Pro model.
The most common calibration target for those use cases is 6500K white point color temperature, 2.2 gamma and a luminance value from 90 cd/m2 to 120 cd/m2, depending on how bright is your room.
Users that require special calibration targets can always switch to DisplayCAL, a free software that is compatible with multiple colorimeter models and offers almost endless calibration options. That’s what I use on all of my devices, including the i1Display Pro that is my daily driver since 2012.
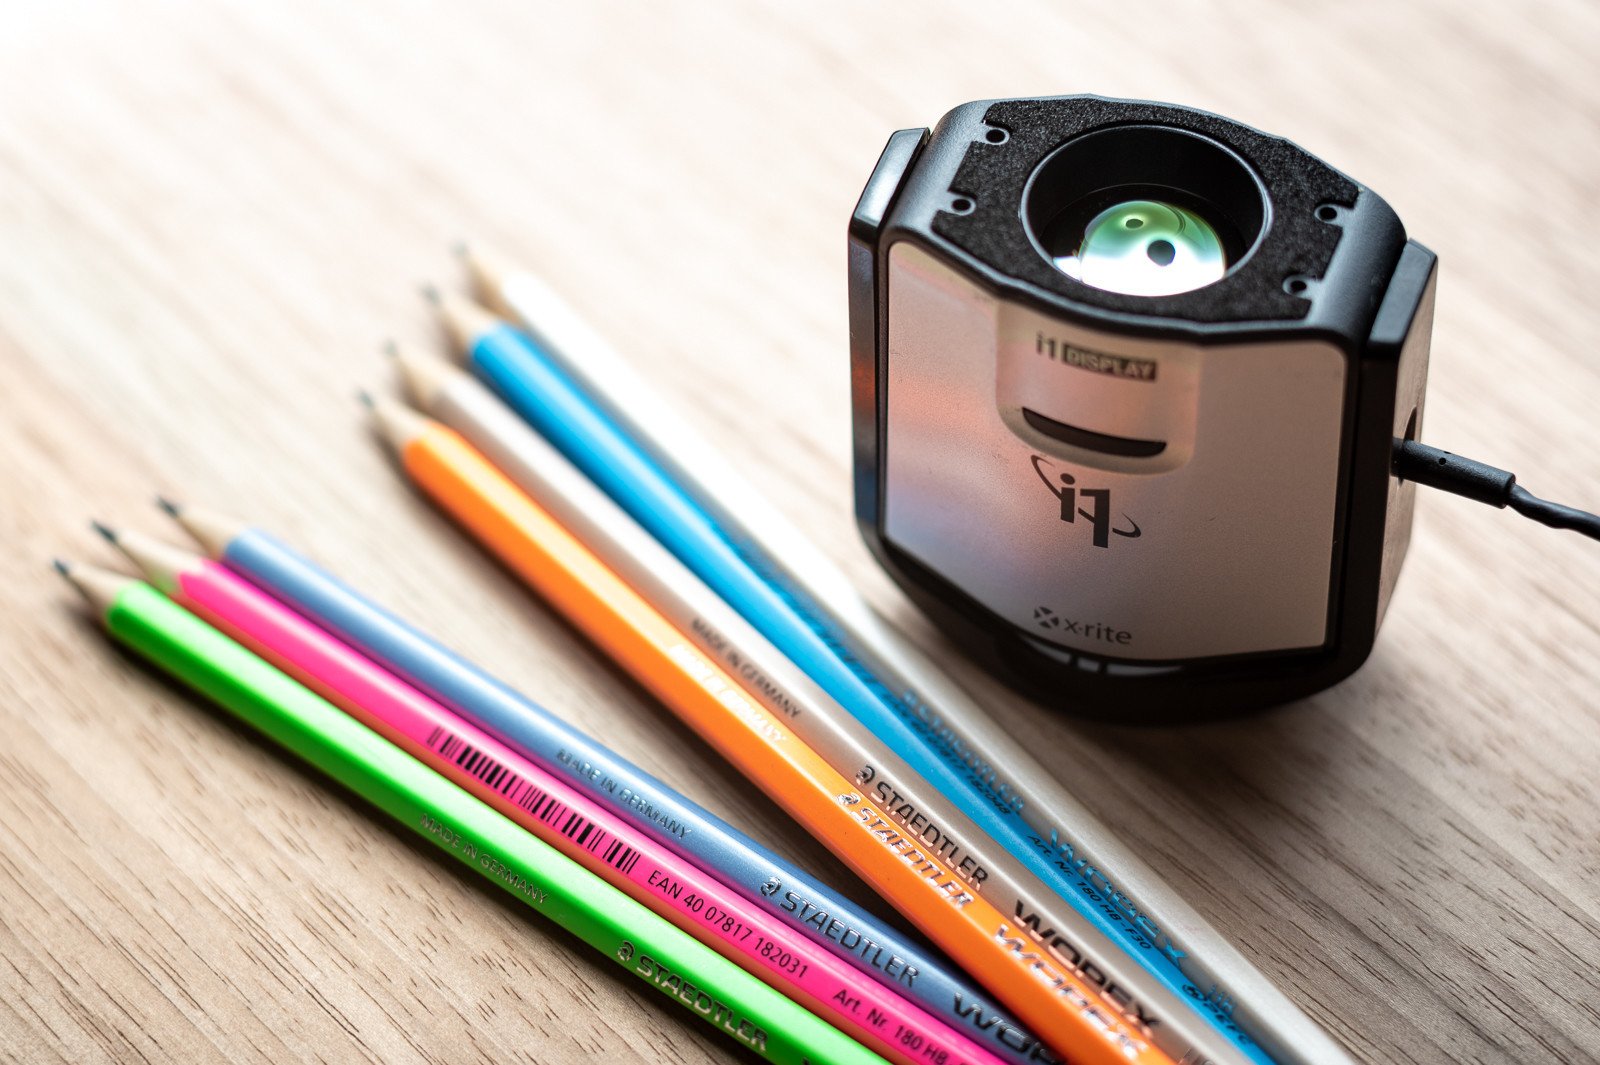
The i1Display Studio has a small edge over the Datacolor SpyderX Pro in terms of raw performance, specially in deep dark tones. If both units cost the same price on your local market, I'd go for the i1, unless calibration speed is important for your workflow. In that case, the SpyderX is much faster: less than 2 minutes vs. a little over 5 minutes for the i1.
Datacolor SpyderX vs. X-Rite i1Display Studio
Actual calibration results are pretty much comparable between both display calibrators and I personally can hardly see the difference when switching back and forth between profiles made with each device. Both units are more than capable of delivering professional grade results.
That said, my pick would be the i1 Display Studio in terms of raw hardware capability. It is basically the same highly regarded sensor as the i1 Display Pro version, but with a firmware that limits it to a slower calibration speed. Hardly a dealbreaker, unless you need to calibrate multiple monitors per day.
Check out our in-depth X-Rite i1Display Studio review.
In terms of longevity, Datacolor historically supports their devices for a longer time and usually delivers more stable software. The X-Rite model has an advantage here, though, for using external software-based matrix corrections to deal with different display backlight technologies, while the SpyderX has those corrections baked in firmware. What this means in practice is that the i1 can be more easily upgraded in the future as new display technologies emerge.
The i1 also has better third-party support and offers a smoother experience with DisplayCAL, which is my software of choice and a great option for more advanced use cases.
All things equal, go for the i1Display Studio, but make sure to check the latest prices on your local market. Here in Brazil, for example, the SpyderX Pro can be had for roughly 30% cheaper than the i1Display Studio, making it a much better purchase.
Tip: The i1Display Studio is essentially a rebranding of the previous Colormunki Display product. Both devices share the same hardware, same measurement performance and differ only on cosmetic changes. This may be a good time to buy a discontinued ColorMunki Display if you manage to get it for a great price or used.
How to calibrate your monitor using the Datacolor SpyderX Pro
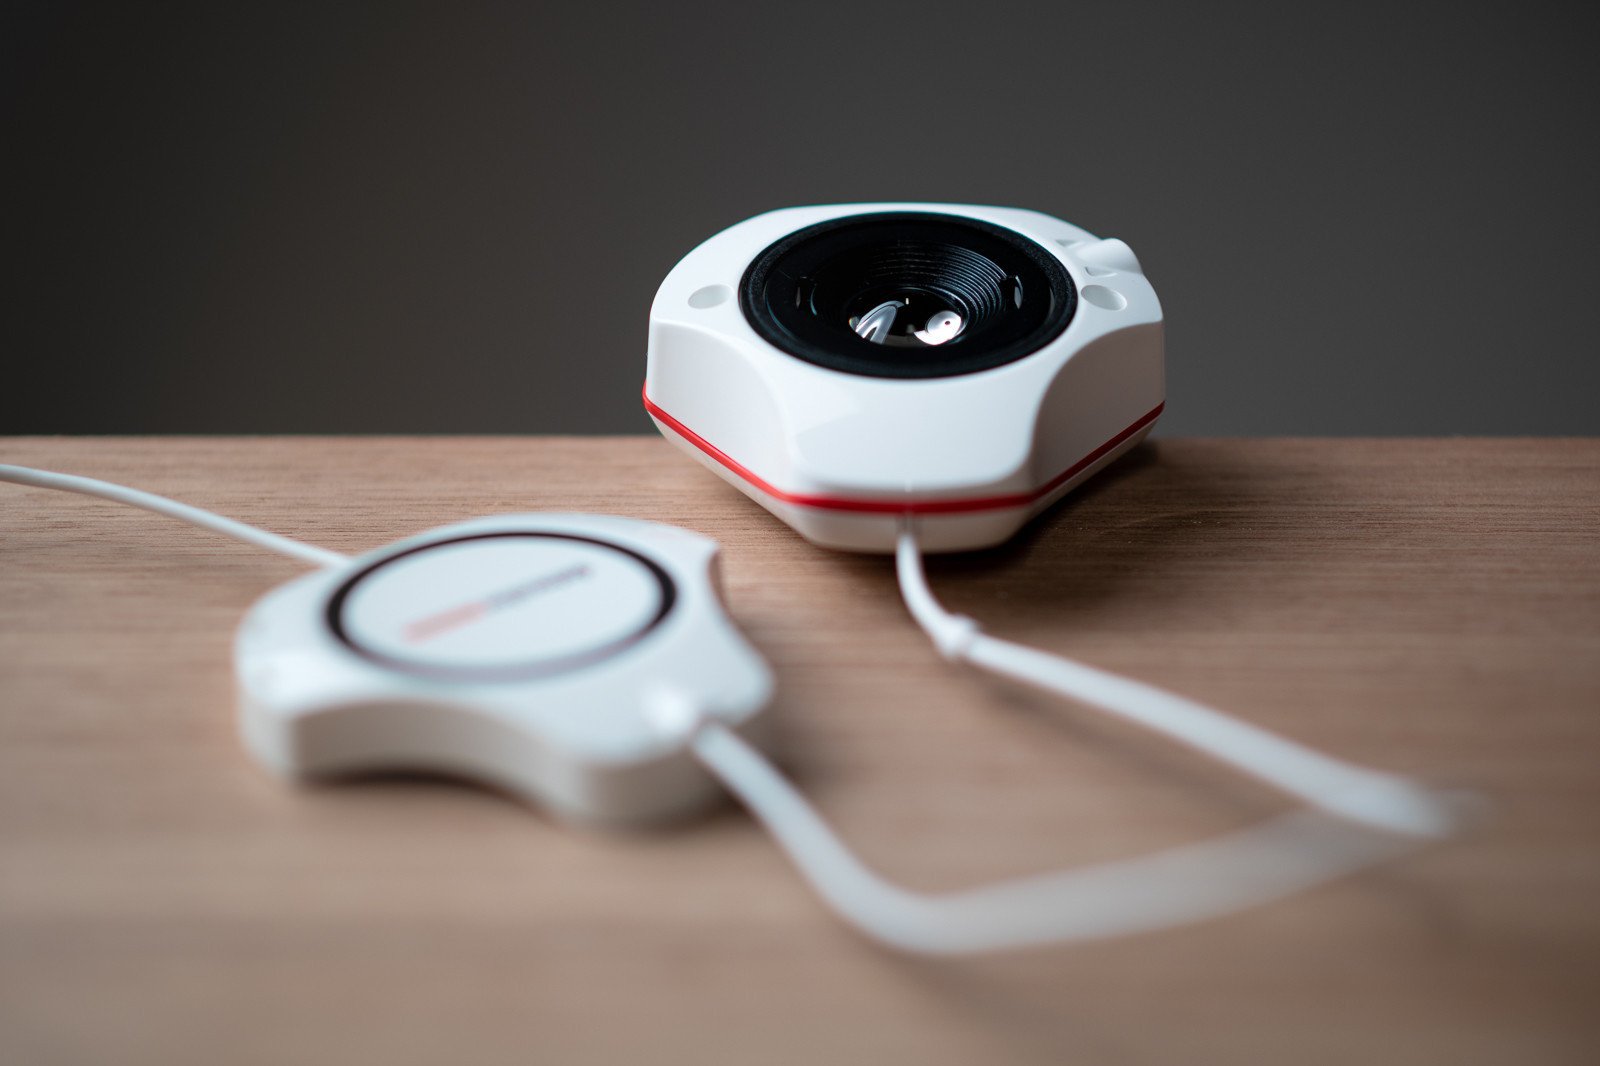
The Datacolor SpyderX colorimeter is a small USB device that can precisely measure the color response of your computer screen. By comparing the actual displayed response of known color values, it creates a color profile that is used by the operating system and color managed applications to show correct colors. This process transforms your monitor from an unknown variable into a standard reference and can greatly improve your screen’s image quality by improving tonal response and shadow detail.
The resulting color profile is used by your operating system and any color managed program to adjust its output, making sure that what you see is as similar as possible to other displays, given their intrinsic differences.
These profiles are also used to match colors between other color managed devices. For example, if you have custom color profiles for your display and photo printer, Adobe Lightroom can understand their differences and match their output as closely as possible, or simulate the printer output on your screen.
Check hardware settings and warm up
Before you begin, the first order of business is to verify all your monitor hardware settings and make sure to select the most appropriate initial state for calibration. This means disabling any advanced image processing – features like game mode, enhanced contrast, dynamic backlight, etc – and getting the white point color temperature and gamma curve as close as possible to your desired target, usually 6500K and 2.2 gamma.
If your monitor has adjustable controls for each RGB color channel, turn on the option “Show RGB Sliders option in Identify Controls screen” in the Advanced Settings section. If not, look for preset color temperatures and set it to the closest value available to the desired white point.
Make sure to also check the video card control panel to make sure there’s nothing that could interfere with color output. For example, reduced RGB range or color calibration settings. Our goal is to keep the image pipeline absolutely neutral and make sure nothing interferes with the calibration / characterization process.
Before beginning, let the display to warm up for 30 minutes. Also disable the screen saver and monitor power settings to avoid disruption during the process.
Colorimeter placement
The SpyderX uses a lens to focus light on the sensor. This helps minimize any environmental interference. For example, glare from nearby lights. In any case, it’s a good idea to avoid an overly bright room and any direct light shining on the calibrator while it works. Also make sure the unit sits flush on your screen. I usually tilt my monitor backwards so the colorimeter weight helps it sit tight on the display surface.
Ambient light sensor and why I don’t use it
SpyderX offers ambient light monitoring and compensation, but I feel this functionality makes more harm than good. In my experience, it’s pretty easy to get incorrect results depending on the colorimeter positioning in relation to the room lights. If you’re doing any work where color accuracy matters, the best approach is to control room lighting to make it consistent throughout the day and within reasonable brightness to minimize visual interference, not the other way around.

Backlight type selection screen.
Calibration settings
The SpyderX uses a step-by-step wizard to guide users along the calibration. All in all, it's a pretty easy process. The most important decision here is to select the correct display type and calibration target.
Four main display types are supported:
- Generic: CCFL (fluorescent lamp) backlight displays.
- Standard LED: sRGB gamut displays.
- Wide LED: Most wide gamut displays with LED backlights.
- GB LED: Green + Blue backlight wide gamut displays.
A quick Google search will tell you the correct backlight type for your display. In a nutshell, GB LED displays are pretty rare, old displays are usually CCFL, 2015 and newer Apple iMacs and MacBooks are Wide LED and generic modern laptop or desktop monitors are Standard LED.
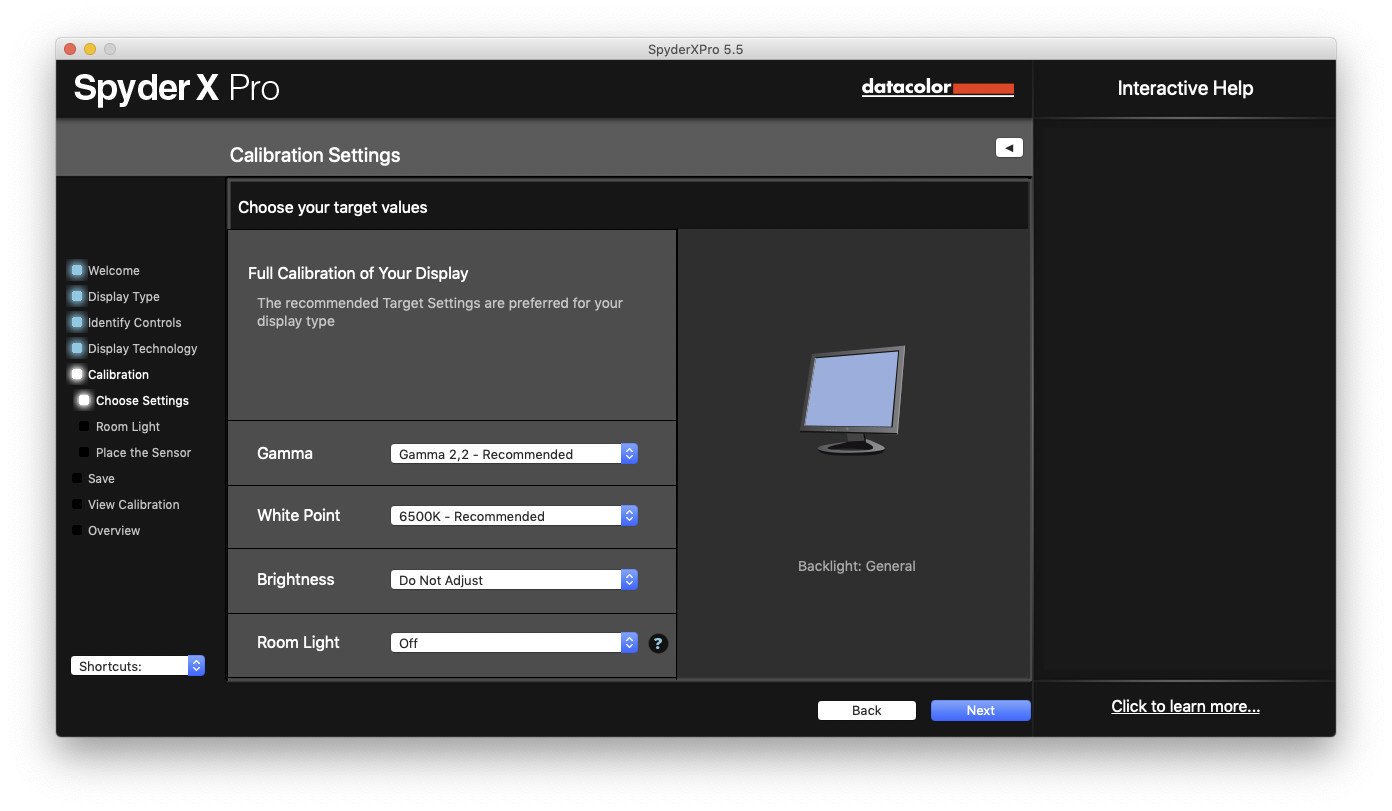
Calibration settings.
As for the target settings, the vast majority of users should pick 6500K, 2.2 gamma, and a luminance target from 90 to 130 cd/m2, depending on room lighting.
As I mentioned above, keep the Room Light setting disabled. I feel that adapting the calibration to room lighting conditions is prone to errors and does more harm than good.
Since the SpyderX is so fast, a good practice is to perform an initial test calibration to make sure all display settings are correct, adjust hardware brightness and color temperature on the monitor on screen controls. This is helpful to make sure all settings are as close as possible to the final target.
My secondary display, for example, was closest to gamma 2.2 when I selected gamma 2.6 on its controls and I was able to catch that difference by observing the profile correction curves using the free ICC Profile Info utility bundled with DisplayCAL.
Another advantage of doing a test calibration first is to get brightness close to your target value – 120 cd/m2, for example – and using native brightness on the final real calibration process.
The goal here is to make the color profile do as little work as possible. The more work the profile and video card LUT do, bigger is the risk of getting banding or harsh tonal transitions, akin to a strong color curve in Photoshop, for example. That's one of the main selling points of better quality, factory calibrated monitors: they are close to a good standard and need less work to be calibrated.
Color profile verification and installation
It's always a good idea to open the monitor profile and inspect the calibration curves to catch any obvious problems. What we want to see is a reasonably smooth set of lines from dark to light.
Make sure the newly generated color profile is installed on the operating system control panel. Most programs will read it from the OS and don't need individual configuration.
Who shouldn’t buy this?
Low quality monitors with TN panels
Calibrating a low quality monitor won't magically make it good enough for color critical work.
Most cheap displays use TN displays that are often 6-bit internally, which leads to severe color banding, especially when calibrated to anything outside their native white point. To make matters worse, TN displays are usually very blue, meaning they have a hardware white point over 7500K.
The final nail in the coffin is that they shift colors depending on the viewing angle. Displays with VA panels are much better than TN, but also suffer from color changes depending on the viewing angle.
In those cases, a better investment would be to pick an inexpensive monitor with a quality IPS panel.
Here are a couple recommendations for inexpensive but good quality quality 27 inch 4K monitors with IPS panels:
- Philips 272P7VUBNB 122% sRGB gamut
- LG 27UL500-W 98% sRGB gamut
At a little higher price point, the Dell U2720Q looks like an unbeatable option with a large color gamut covering 95% of the DCI-P3 colorspace.
High-end displays with true hardware calibration
One of the most common misconceptions about color management is the difference between calibration and profiling.
While we tend to use both terms interchangeably, true monitor calibration means being able to change the hardware response directly within the monitor.
Profiling means characterizing how a particular device reproduces colors and a color profile can be used to compensate and effectively calibrate a display by altering color response at the graphics card level.
Both are not mutually exclusive. A factory calibrated display still requires a colorimeter to create a color profile characterizing that particular unit response. This color profile is required by the operating system and color managed apps so they can understand how the hardware, the monitor itself, reproduces color.
High-end monitors with true hardware calibration capabilities use custom software and are compatible with specific colorimeter models.
As the time of this writing, the SpyderX is only compatible with BenQ Palette Master Element and NEC SpectraView II software.
Dell PremierColor displays use the i1Display Pro for calibration while Eizo ColorEdge monitors have limited compatibility with Datacolor devices.
In practice, if you have a display with hardware calibration, make sure to check the updated compatibility lists before purchasing a calibrator. Generally speaking, the i1Display Pro is compatible with all those programs.
Higher budget work
If your work budget justifies a bigger invest in color management, I'd opt for the i1Display Pro, which costs about USD 90 more than a SpyderX Pro. As mentioned above, it's a better hardware in terms of low light measurement and I've been using mine for the past 8 years. That difference in price feels smaller when diluted over time or in front of high budget work.
Special use cases, like HDR video mastering
True HDR monitors with very high peak brightness require special devices for calibration. As far as I know, there's only one reasonably priced device on the market capable of calibrating those devices: the recently launched X-Rite i1Display Pro Plus colorimeter. This special Plus version of the familiar i1Display Pro colorimeter can handle brighter displays up to 2000 cd/m2, including the Apple Pro Display XDR.
Bonus tip: go from good to excellent by using free software
DisplayCAL is a free display calibration and profiling software that is compatible with most measurement devices on the market.
It provides much more advanced and flexible options than the bundled software and can be used in a variety of use cases from the most common calibration targets to complex video 3D LUTs or calibration targets specific for video and color grading. The possibilities are almost endless.
What is cool about DisplayCAL is that it brings advanced features and arguably better quality to devices that are usually differentiated only in software bundle. Put in practice, DisplayCAL removes the gap between SpyderX versions and goes much beyond what the Elite version offers.
Speaking specifically about the SpyderX, the only drawback I can see is that using it with DisplayCAL is much slower than with the bundled software. A full calibration can take 20 minutes, depending on the settings.
It's also a more complicated and less user friendly software for less technical users, while the Datacolor bundled software uses a step-by-step wizard that hides complex decisions in the name of ease of use.
If you buy a compatible colorimeter or spectrometer and would like to get the most of it, give DisplayCAL it a try. Highly recommended!

DisplayCAL is not as user friendly as the bundled SpyderX software, but it works well with the sensor and offers advanced calibration capabilities and excellent quality for an unbeatable price: free.
Conclusion
The Datacolor SpyderX is an excellent device that does its job without much fuss. What more could we ask for? I make a point of only writing about products that I personally use and recommend. The SpyderX Pro is an easy pick.
Did I miss anything? Leave a comment if you have any question and I’ll be happy to answer.